
How to Change Smoke Alarms Safely in 5 Simple Steps

Change Smoke Alarms Before They Fail

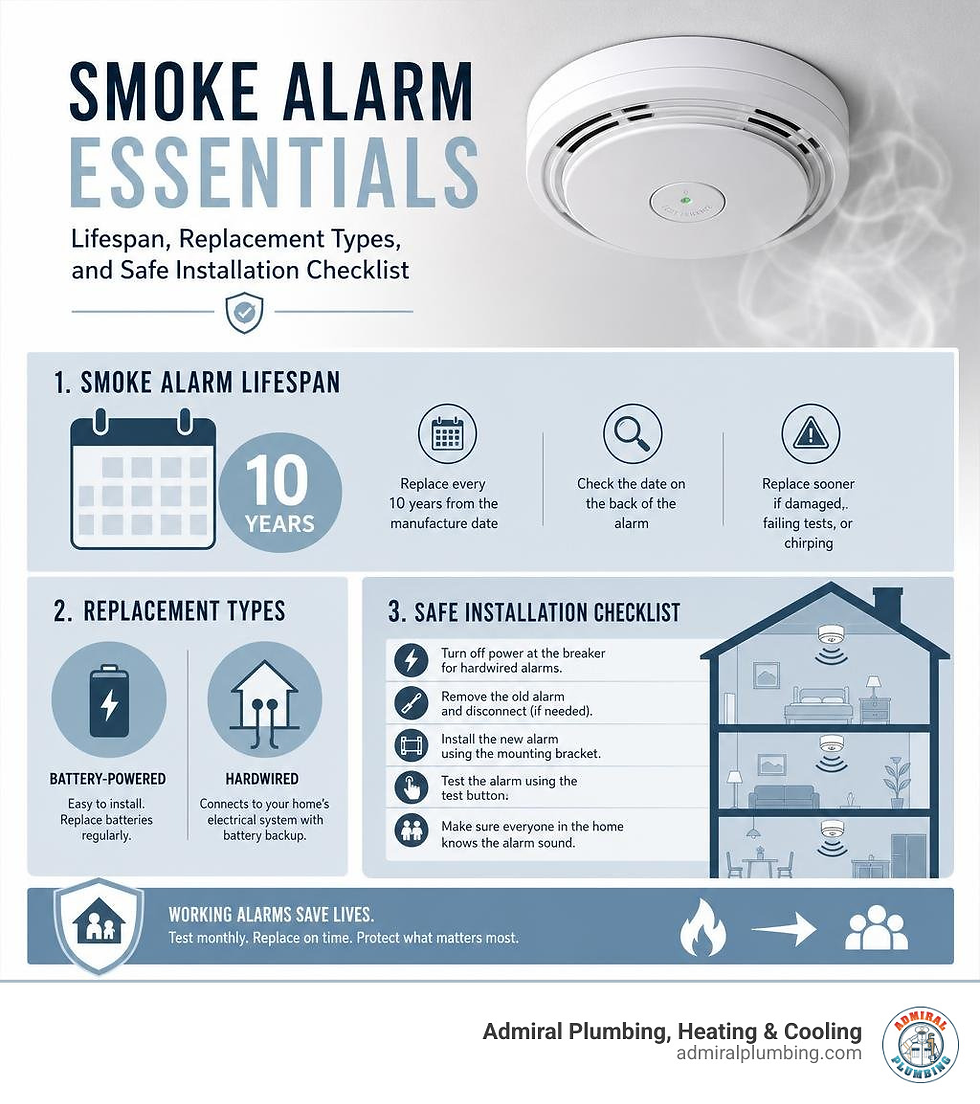
For changing smoke alarms safely, replace any unit that is 10 years old, damaged, failing tests, or giving an end-of-life chirp. Check the manufacture date on the back first, choose a compatible replacement, and test it as soon as it is installed. For hardwired alarms, switch off the correct breaker before removing the unit; call a licensed electrician if the wiring is damaged, incompatible, or you are not comfortable working near electrical connections.
Working alarms matter. About 3 out of 5 home fire deaths happen in homes with no smoke alarms or alarms that do not work. When an alarm sounds, your family may have less than two minutes to get outside, so a dead battery or expired sensor is not a small issue.
In this guide, you will learn how to identify your alarm type, replace battery-powered and hardwired models, stop common chirps, and test the system afterward.
I am Adam Wettach, owner of Admiral Plumbing, Heating & Cooling, with years of hands-on residential service experience. While changing smoke alarms is a small home task, I know that careful installation, testing, and knowing when to call a qualified pro can make a major difference in home safety.
How Often to Replace Alarms and Check Expiration Dates
Smoke alarms do not last forever. Even if the unit still beeps when you press the test button, the internal sensing chamber breaks down over time due to dust, humidity, and chemical degradation. Industry standards like NFPA 72 mandate replacing smoke alarms every 10 years from their manufacture date.
Holding onto outdated alarms creates a false sense of security. As sensors age past a decade, their reaction times slow dramatically, leaving your household vulnerable. If you have combination smoke and carbon monoxide (CO) alarms, electrochemical CO sensors degrade even faster; most combination units require full replacement after 5 to 7 years.
A smoke detector with a missing battery or an expired internal sensor offers zero defense. According to national fire data, functional smoke alarms cut the risk of dying in a residential fire in half. To keep your family protected, follow a reliable smoke alarm replacement timeline guide to ensure every detector in your home stays within its operational service life.
How to Locate and Read the Expiration Date
To find out how old your detector is, take it down and look at the manufacturer label on the back of the casing.

Remove the unit: Gently grasp the alarm and twist it counter-clockwise about half an inch to release it from the ceiling mounting bracket.
Find the date stamp: Locate the printed or embossed date on the back label. This is the manufacture date, not the purchase or installation date.
Calculate the expiration: Add 10 years to that manufacture date (or 7 years for combination smoke/CO detectors). For example, a detector manufactured in March 2016 reached the end of its operational lifespan in March 2026.
Identify end-of-life signals: If a unit emits a distinct double-chirp every 30 to 60 seconds that does not stop after a battery replacement, the internal software is signaling that the sensor has officially expired.
Identifying Connection Types Before Changing Smoke Alarms
Before buying replacement units, determine which power configuration your home uses:
Battery-Operated (Replaceable 9V or AA): These standalone units operate entirely on standard alkaline or lithium batteries. They need battery replacements every 6 to 12 months.
Sealed 10-Year Lithium Battery Alarms: These tamper-proof units feature a built-in lithium battery designed to power the detector for its entire 10-year lifespan. You never have to change the battery, but the whole unit must be discarded when it expires.
Hardwired with Battery Backup (120V): These alarms connect directly into your home's 120-volt electrical wiring and feature a 9V, AA, or lithium backup battery to keep the system active during power outages.
Interconnected Alarms (Hardwired or Wireless RF): When one interconnected alarm senses smoke, every detector throughout the entire home triggers simultaneously. This is standard in modern building codes.
Understanding your power source helps you choose the right replacement and learn how to check detector battery life properly.
Choosing the Right Type of Replacement Alarm
When shopping for replacements, select a sensor type that matches your room layout and safety needs.
Photoelectric Smoke Alarms: These contain a light beam and a light sensor inside an internal chamber. When smoldering, smoky fire particles enter the chamber, they scatter the light beam onto the sensor, triggering the siren. Photoelectric alarms excel at detecting smoldering, slow-burning fires (like a cigarette dropped on furniture) and produce significantly fewer false alarms from cooking steam.
Ionization Smoke Alarms: These utilize a minute amount of radioactive material (Americium-241) to ionize the air between two electrically charged plates. When smoke enters, it disrupts the flow of ions and triggers the alarm. Ionization units detect fast, flaming fires quickly but are prone to nuisance tripping near kitchens and bathrooms.
Dual-Sensor Smoke Alarms: These units house both photoelectric and ionization sensors in a single housing, providing comprehensive protection across all fire scenarios.
Alarm Feature | Photoelectric Sensor | Ionization Sensor | Dual-Sensor (Combo) |
Best Fire Type | Smoldering, slow burns | Fast, flaming fires | All residential fire types |
Kitchen/Bath False Alarms | Very Low | High (steam/cooking smoke) | Moderate |
Primary Mechanism | Light scattering optical sensor | Ionized radiation chamber | Optical + Ionization chambers |
Average Hardware Cost | $15 – $30 | $10 – $20 | $25 – $45 |
Recommended Location | Living rooms, hallways, bedrooms | Garages, utility basements | Central hallways, bedrooms |
Hardwired vs. Battery-Operated Smoke Detectors
Hardwired alarms provide the gold standard in safety because they form an interconnected network: an alert in the basement immediately sounds the alarm in upstairs bedrooms. Building codes require hardwired interconnected detectors in all new construction and major renovations.
Battery-operated units provide crucial flexibility for older homes lacking dedicated alarm wiring loops. When using standalone battery units, opt for models featuring wireless radio frequency (RF) interlinking so they can communicate across rooms without physical wires.
According to National Fire Protection Association (NFPA) standards, you should install alarms:
Inside every bedroom.
Outside each separate sleeping area (in hallways).
On every level of the home, including basements and finished attics.
At least 10 feet away from cooking appliances and 3 feet away from bathroom doors to prevent steam interference.
DIY Installation vs. Hiring a Professional Electrician
Replacing a battery-powered alarm or swapping an existing hardwired alarm with an identical plug-and-play wiring harness is a straightforward DIY task.
However, you should call a licensed professional if:
Your home lacks existing hardwired connections and you need to run new 120V circuits.
The existing wiring harness is charred, brittle, cracked, or improperly grounded.
You are unfamiliar with main electrical panel safety.
Local municipal codes require a licensed electrician to pull permits for mains-voltage life-safety devices. For regional requirements on mains power work, review these guidelines on electrician requirements for hardwired alarms.
Step-by-Step Process for Changing Smoke Alarms Safely
If your home has experienced fire or heat issues that compromised interior walls, always schedule a professional inspection for residential smoke repair to ensure structural elements, electrical boxes, and ventilation pathways are safe before mounting new safety devices.

Best Safety Practices When Changing Smoke Alarms
Turn off the main breaker: Never touch exposed 120V wiring harness leads without cutting power at the service panel.
Test for live voltage: Use a non-contact voltage tester on the wiring junction before unscrewing wire nuts.
Use a sturdy step ladder: Position your ladder directly under the alarm. Never overreach or stand on unstable chairs.
Wear safety glasses: Ceiling drywall dust and old insulation can fall into your eyes while unscrewing mounting plates.
Step 1: Turn Off Power and Remove the Old Alarm
Go to your home’s breaker panel and switch off the circuit breaker labeled for smoke detectors or lighting circuits. Return to the detector and press the test button to confirm power is dead.
Grasp the old detector body and rotate it counter-clockwise to detach it from the mounting plate. If it is a hardwired model, squeeze the locking tabs on the sides of the plastic quick-connect wiring harness and pull it firmly out of the back of the unit.
Step 2: Install the New Mounting Bracket and Connect Wiring
Unscrew the old mounting bracket from the electrical junction box using a Phillips-head screwdriver. Align your new alarm's mounting bracket with the screw holes in the ceiling box and secure it firmly.
If you are replacing a hardwired detector of a different brand, you will need to replace the wiring harness:
Confirm zero voltage with your tester.
Unscrew the wire nuts holding the old harness.
Connect the black wire (120V hot) of the new harness to the black house wire.
Connect the white wire (neutral) to the white house wire.
Connect the red or yellow wire (interconnect communication line) to the corresponding traveler wire in the box.
Cap each connection with a secure wire nut and tuck the wires cleanly back into the junction box.
Step 3: Attach the New Alarm and Restore Power
Plug the quick-connect wiring harness firmly into the rear socket of the new alarm until it clicks into place. If your new unit uses replaceable backup batteries, open the battery door and install fresh alkaline or lithium batteries, matching the polarity markings (+ and -). If it has a pull-tab for a pre-installed battery, pull it straight out.
Align the slots on the back of the detector with the tabs on the mounting bracket, push upward gently, and twist clockwise until the alarm locks securely into position. Follow standard step-by-step smoke detector replacement instructions to ensure physical alignment is snug against the ceiling drywall. Return to the electrical panel and flip the circuit breaker back on. A steady green LED should illuminate on the unit, signaling active AC power.
Step 4: Test the Smoke Alarm and Interconnected Units
Press and hold the test button on the cover for 3 to 5 seconds. The unit should sound a piercing, 85-decibel alarm sequence (three loud beeps, pause, three loud beeps).
If your alarms are interconnected, keep holding the button until the other units throughout the house begin sounding in unison. Walk your home to ensure every bedroom and hallway detector is actively echoing the alert.
Step 5: Label the Replacement Date and Clean Vents
Take a permanent marker and write the installation month and year, along with the 10-year replacement date, on the exterior rim or inside edge of the unit.
Clear away any drywall dust created during installation. If you are handling a broader cleanup after an incident, pairing your fire safety upgrades with professional smoke remediation ensures all air ducts and living spaces remain free from toxic soot residue.
Troubleshooting Phantom Chirps, Testing, and Disposal
A detector that beeps erratically after a fresh install is usually not defective. It typically suffers from one of three issues: trapped dust, residual electrical charge, or extreme temperature fluctuations. If you ever experience a severe electrical fault or furnace puffback that triggers persistent alerts, rely on certified emergency smoke damage services to resolve underlying hazards. Otherwise, follow verified tips for silencing chirping alarms safely using the reset techniques below.
Why Smoke Alarms Chirp at Night and How to Fix It
Smoke alarms almost always start chirping between 2:00 AM and 5:00 AM. This happens because home temperatures drop during the night. As ambient room temperatures cool, the chemical reaction inside an alkaline battery slows down, dropping its voltage output. If a battery was already hovering near its low-voltage threshold, the night chill drops it past the limit, triggering the low-battery warning chirp.
To perform a complete hard reset and drain residual electrical charge from internal capacitors:
Turn off the breaker and remove the alarm from the ceiling bracket.
Disconnect the wiring harness and remove the backup battery.
Hold down the test button for 15 to 20 seconds. This completely drains all residual power stored in the internal capacitors.
Clean the sensing chamber using a can of compressed air or a vacuum attachment to clear out dust, lint, or tiny insects.
Insert a brand-new, name-brand battery (avoid rechargeable batteries, which suffer from steep voltage drop-offs).
Reconnect the wiring harness, lock the unit onto the bracket, and turn the breaker back on.
Proper Environmental Disposal of Old Smoke Alarms
Photoelectric Alarms: These contain no radioactive materials and can be recycled alongside standard household consumer e-waste or disposed of according to local municipal solid waste guidelines.
Ionization Alarms: Because ionization alarms contain a minute, sealed amount of Americium-241, check with your local waste authority. Many manufacturers offer take-back programs where you can mail expired units back for safe industrial disposal.
Batteries: Always remove 9V, AA, or lithium batteries and drop them off at dedicated battery recycling collection points rather than tossing them in standard trash bins.
Frequently Asked Questions About Smoke Alarms
Why does my smoke alarm keep chirping after I changed the battery?
If an alarm continues chirping after installing a fresh battery, it usually means residual electricity remains in the internal capacitor, the battery drawer is slightly ajar, dust is blocking the optical sensor, or the unit has reached its 10-year end-of-life limit. Perform a hard reset by removing the battery, disconnecting AC power, and holding the test button for 15 seconds.
Can I replace a hardwired smoke alarm myself?
Yes, as long as you turn off the power at the main circuit breaker and the replacement alarm uses a compatible wiring harness. If the wiring requires running new lines through walls, replacing damaged junction boxes, or adding circuits to your main panel, hire a licensed electrician.
Do I need to replace all smoke alarms in my home at the same time?
Yes, replacing all smoke alarms at once is recommended. Most homes have alarms installed during initial construction, meaning all units share the exact same age. Swapping them together ensures unified age tracking and prevents communication errors across interconnected communication loops. For further reading on safety codes, consult official smoke alarm safety regulations and FAQs.
Conclusion
Keeping your smoke alarms in top working condition is the simplest, most effective way to safeguard your household against catastrophic fires. By replacing units every 10 years, choosing the right combination of photoelectric and dual-sensor technologies, and testing interconnected systems monthly, you protect the people who matter most.
If you are looking for more details on routine home maintenance, explore our guide on how to safely change your smoke detector. For total peace of mind with your home's heating, ventilation, and plumbing systems across Northern Utah, trust the friendly, certified team at Admiral Plumbing, Heating & Cooling. Stay proactive, test your alarms regularly, and keep your home safe!


Comments