
Troubleshooting Common Water Tank Leaks and Cracks

How to Fix a Leaking Water Tank Safely

First, shut off the water supply and check where the water starts. A loose fitting or faulty overflow valve may need a simple part replacement. If the tank wall is leaking, lower the water below the damaged spot, clean and dry the area, and use a repair made for the tank material. Let it fully cure before slowly refilling and checking for leaks. Do not patch a leaking water heater tank body; have it replaced.
Rust, cracks, and failing seams can worsen as water pushes against the tank wall. Finding the source early helps you avoid a patch that hides a larger problem.
I'm Adam Wettach, owner of Admiral Plumbing, Heating & Cooling, and I've spent years handling plumbing repairs and water heater replacements. When helping homeowners fix water tank leak problems, I start by checking the fittings and the tank itself to see which repair is safe.

Water loss is a massive issue nationwide. Roughly 126 billion cubic meters (33.3 trillion gallons) of treated water escapes storage vessels and underground infrastructure annually, while corrosion costs the water and wastewater industry approximately $36 billion every year in the United States alone. When hydrostatic pressure constantly bears down on an aging vessel, a microscopic pinhole can quickly expand into a serious structural failure.
Identifying the Root Cause and Severity of Tank Leaks
Finding water pooling around your storage vessel is frustrating, but pinpointing the exact origin is essential before grabbing your tools. Many people assume a puddle beneath a vessel indicates a cracked shell, but water can travel down seams, insulation jackets, and pipes before dripping onto your floor. Effectively diagnosing hidden plumbing issues protects you from wasting time applying surface patches over dry metal while a fitting overhead continues to drip.
Tank failures generally stem from three core root causes:
Internal and External Corrosion: Carbon steel exposed to oxygenated water corrodes at a uniform rate of 0.1 mm to 0.2 mm per year. However, localized pitting corrosion aggressively bores into walls at rates between 0.5 mm and 1.5 mm per year. In systems harboring bacteria, microbiologically influenced corrosion (MIC) can chew through metal at up to 2.0 mm per year.
Weld Seam Fatigue: Constant thermal expansion, contraction, and cyclic pressure changes flex the joints of welded steel and molded plastic tanks, eventually causing seam cracks.
Mechanical and Material Degradation: Polyethylene vessels degrade from intense UV exposure or mechanical stress, while concrete structures crack as surrounding soil settles.

Diagnostic Testing: Visual Checks, Dye Testing, and Pressure Drops
To determine the severity of a leak, start with a systematic visual check. Wipe down the exterior walls with dry microfiber cloths and watch for active weeping or rust trails running down the seams.
If you suspect an active leak in an underground or opaque cistern, specialized testing methods become necessary:
Food-Grade Dye Testing: Add a non-toxic, food-grade tracer dye to the water column. The concentrated color will visibly migrate toward hairline fissures and escape points.
Pressure Drop Monitoring: Close all outgoing distribution valves. If your pressure gauge steadily drops over a two-hour window, water is escaping through an unsealed breach.
Advanced Detection Methods: For large-scale or buried infrastructure, technicians utilize acoustic listening devices or tracer gas testing to detect micro-fissures without destructive excavation. When home diagnostic methods are inconclusive, bringing in professional water leak repair specialists prevents minor seepage from undermining concrete foundations.
Differentiating Fitting Leaks from Tank Body Cracks
Before assuming your tank body is compromised, check every external connection. A substantial percentage of reported tank failures are actually plumbing component malfunctions:
Inlet and Outlet Connections: Threaded connections frequently loosen over time due to pump vibration or degraded thread sealant.
Drain Valves: Sediment accumulation can block the internal washer of a sediment drain valve, allowing water to trickle out of the spout.
Temperature and Pressure (T&P) Relief Valves: On hot water storage vessels, an over-pressurized system or a worn spring will cause the safety valve to discharge continuously.
Overflow Pipes: In atmospheric gravity tanks, a malfunctioning ballcock or float valve allows water levels to rise past the safe operating threshold. Following a standard guide for troubleshooting overflow pipe leaks can resolve the issue with a quick float adjustment or a simple washer replacement.
Condensation: In humid environments, cold inlet water filling a large vessel causes atmospheric moisture to condense along the exterior shell, mimicking an active wall leak.
Material-Specific Methods to Address Water Storage Tank Damage
Different storage materials require distinct repair chemistry. Using the wrong compound can lead to immediate bonding failure, water contamination, or catastrophic structural splitting under hydrostatic load.
Tank Material | Primary Failure Mechanisms | Recommended Repair Method | Tensile Adhesion / Bond Strength | Expected Repair Lifespan |
Carbon & Galvanized Steel | Pitting corrosion, seam fatigue, rust scale | Cold welding epoxy putty reinforced with fiberglass mesh | 2,500 – 3,500+ PSI | 5 – 10 Years |
High-Density Polyethylene (HDPE) | UV embrittlement, stress cracking near ports | Thermal plastic extrusion or hot-air rod welding | 80% – 100% of parent plastic | Permanent / Lifetime of Tank |
Concrete & Masonry | Settling cracks, hydrostatic joint failure | Low-pressure epoxy injection or hydraulic cement | 1,500 – 2,000+ PSI | 10 – 20+ Years |
Fiberglass (FRP) | Delamination, impact cracking, resin starvation | Multi-layer epoxy or vinyl-ester laminate patching | 2,000 – 3,000 PSI | 8 – 15 Years |
Steel and Galvanized Water Tanks: Cold Welding and Epoxies
Carbon steel and galvanized metal vessels are resilient against high pressures, but they are vulnerable to aggressive oxidation once protective zinc or paint coatings degrade. When pinholes form, permanent metal tank repair techniques rely on high-modulus, two-part cold-weld epoxy pastes.
Cold-bonding epoxies eliminate the fire hazards and bi-metallic corrosion risks associated with hot welding on thin, oxidized sheet metal. Quality metal-filled epoxies bond directly to properly profiled steel, achieving tensile shear strengths exceeding 3,000 PSI to withstand significant hydrostatic pressures.
How to Fix Water Tank Leak Problems in Plastic Poly Tanks
Polyethylene (HDPE, MDPE, and LDPE) tanks present a unique challenge: they possess low surface energy, which makes standard glues, silicone sealants, and standard epoxies peel off as soon as the tank expands under water weight. As noted by professional tank repair specialists, trying to seal a poly tank with consumer glues or standard urethane inevitably fails once the tank fills.
The only permanent fix is thermal plastic welding methods. This process involves:
Drilling stress-relief holes at both ends of the crack to halt propagation.
V-grooving the crack with a rotary tool.
Using a hot-air plastic welder or an extrusion welder with matched HDPE filler rod (ideally UV-stabilized black rod for outdoor tanks) to fuse the joint.
A properly executed thermal weld restores 80% to 100% of the parent material's original structural strength.
Concrete and Masonry Tanks: Hydraulic Cement and Injections
Concrete cisterns often develop settling fissures over time. To restore structural integrity and water tightness, technicians use two distinct approaches:
Hydraulic Cement: An expanding, fast-setting cement compound designed to be packed into chiseled dovetail joints. It expands as it hydrates, creating a mechanical plug that cures even in moist environments.
Low-Pressure Epoxy Injection: For dormant structural cracks as narrow as 0.002 inches (0.05 mm), low-pressure epoxy injection restores tensile continuity across the entire concrete wall thickness.
For complex structural degradation or hidden underground fissures, homeowners turn to specialized leak restoration approaches to ensure the repair stands up to groundwater pressure.
Step-by-Step Guide to Fix Water Tank Leak Issues with Cold Welding and Epoxy

When addressing pinholes, seam leaks, or localized corrosion on a non-pressurized steel or fiberglass storage tank, cold-weld epoxy compounds provide a durable, long-term fix. Follow this detailed process to execute a permanent repair.
Surface Preparation Needed to Fix Water Tank Leak Damage Permanently
Adhesive strength depends entirely on how well you prepare the substrate. Epoxy cannot bond to loose rust, scale, biofilm, or moist surfaces.
Lower the Water Level: Drain the tank so the water line sits at least 6 to 12 inches below the damaged area. Hydrostatic pressure behind an active puncture will displace curing epoxy and compromise the seal.
Mechanical Abrasion: Use an angle grinder equipped with a 60-to-80 grit flap disc, a wire wheel, or coarse emery cloth to strip the surface down to bare, shiny metal (following SSPC-SP 11 standards for power tool cleaning). Create a rough cross-hatch profile across an area extending at least 2 to 3 inches beyond the damage in all directions.
Chemical Degreasing: Wipe the profiled area thoroughly with a residue-free solvent like acetone, methyl ethyl ketone (MEK), or a specialized industrial cleaner. Let the solvent flash off completely so the surface is dry, clean, and free of oil.
Applying Epoxy Putty and Reinforcing Gaps with Fiberglass Mesh
Once the surface is clean and dry, work steadily to apply the epoxy before it begins to set:
Knead or Mix the Compound: If using a two-part epoxy stick, cut the required volume and knead it with gloved hands until it achieves a uniform, streak-free color. If using a paste-grade resin system, mix the base and solidifier according to the manufacturer's specified ratio.
Apply the Base Plug: Press the epoxy firmly into the center of the puncture or fissure using a flat putty spreader. Force the compound into the void to create a strong mechanical anchor.
Layer Structural Fiberglass Mesh: For splits or holes larger than 1/8 inch, embed a piece of woven fiberglass mesh directly into the uncured base layer. Apply a second layer of epoxy over the mesh, thoroughly saturating the weave.
Feather the Edges: Smooth and taper the perimeter edges of the patch outward at least 2 inches onto the sound metal. Feathering prevents sharp edges that could lift under pressure or fluid flow.

Curing Times and Post-Repair Pressure Validation
Rushing the refill process is the most common reason DIY patches fail. Chemical cross-linking takes time to reach full tensile strength:
Standard Ambient Curing: Allow the epoxy patch to cure undisturbed for a minimum of 24 hours at 70°F (21°C). If ambient temperatures drop below 60°F, curing times can double; use an indirect heat lamp if necessary to keep the area warm.
Graduated Hydrostatic Testing: Do not fill the tank to maximum capacity right away. Fill the vessel up to the repair line and observe for 30 minutes. If no weeping occurs, continue filling in increments of 25% capacity, inspecting the patch at each stage.
Disinfection Protocol: For drinking water systems, sanitize the interior following standard AWWA guidelines (typically a light chlorination wash followed by a complete freshwater flush) before returning the vessel to active service.
When to Patch, Reline, or Replace Your Water Tank
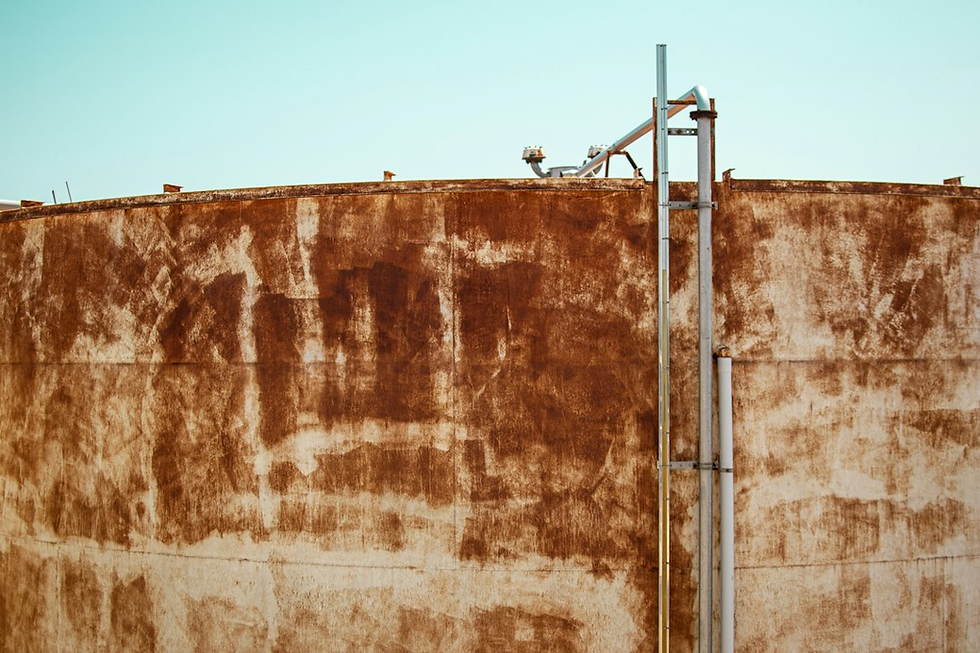
A targeted patch is an effective fix for localized damage, but it cannot solve widespread structural fatigue. Knowing when to patch, reline, or replace your vessel is critical for long-term safety and cost control.
Strategy | Ideal Conditions | Typical Cost Profile | Expected Lifespan | Primary Limitations |
Targeted Patch (Cold Weld / Weld) | Isolated pinhole, single fissure, wall thickness > 50% intact | Low | 5 – 10 Years | Does not stop corrosion occurring in surrounding unpatched areas. |
Full Interior Relining | Structurally sound shell with widespread coating failure | Moderate (30–50% of replacement) | 10 – 20+ Years | Requires complete tank draining, abrasive blasting, and confined-space safety protocols. |
Full Tank Replacement | Severe wall thinning (>50%), base ruptures, split water heaters | High | 15 – 25+ Years | Higher upfront investment and associated installation labor. |
For pressurized residential hot water systems, reviewing a guide on evaluating water heater repair versus replacement will help you determine whether a simple component swap or a new unit makes the most financial sense.
Structural Thinning and Safe Repair Limits
Industrial storage safety standards (such as API 653) provide clear guidance on structural integrity: when uniform corrosion or pitting has reduced the original metal wall gauge by more than 50%, the vessel is considered beyond repair.
Attempting to patch a severely thinned tank creates a localized hard point. The surrounding metal will simply tear away around the patch under normal hydraulic cycling, creating a high risk of sudden rupture.
Interior Tank Relining for Extended Lifespan
When the structural shell remains sound but interior protective coatings have degraded, full relining is an excellent, cost-effective alternative to complete replacement.
In fact, approximately 98% of structurally sound tanks can be returned to their full operational life expectancy through professional relining. Modern 100% solids polyurea and high-build epoxy lining systems establish an impermeable barrier that bonds to prepared substrates with up to 1,965 PSI of adhesion strength. These linings protect the tank from future corrosion without requiring you to disconnect or remove the physical tank.
Recognizing When Full Tank Replacement Is Mandatory
Certain damage patterns indicate that a storage vessel has reached the end of its safe service life:
Bottom Plate and Floor Seam Rupture: Settling damage and trapped moisture beneath the base of a tank cause bottom-out rust that cannot be safely patched from the outside.
Extensive "Lacy" Oxidation: Widespread spiderweb-like pitting across multiple panels indicates systemic metal degradation.
Water Heater Tank Body Leaks: Water heaters operate under continuous pressure (typically 40 to 80 PSI) alongside heavy thermal cycling. Once internal glass linings crack and the steel jacket weeps, patches will not hold. Understanding the warning signs of water heater tank leaks helps you schedule a dedicated water heater replacement before a catastrophic tank split floods your property.
Frequently Asked Questions About Water Tank Leak Repairs
Can you patch a leaking water tank without draining it first?
For metal and plastic vessels, no. Hydrostatic pressure from the water column pushes outward through the breach, creating a microscopic fluid barrier that prevents epoxies, poly-welds, or sealants from bonding to the substrate.
While fast-setting hydraulic cements can set underwater on heavy masonry walls, external patches on thin-walled tanks almost always fail unless you lower the water level below the leak site before beginning your repair.
Are epoxy putties safe for drinking water storage tanks?
Not all epoxies are safe for drinking water. When repairing potable water storage systems, you must select products certified under NSF/ANSI 61 (and compliant with modern NSF 600 health effects criteria).
Standard industrial epoxies and automotive cold-welds can leach volatile organic compounds (VOCs), bisphenol compounds, or heavy metal curing agents into your water supply. Always verify the potable-water safety rating on the product label and allow the material to cure fully before refilling the tank.
How long does a cold-welded or epoxy tank patch typically last?
A properly applied, high-modulus epoxy patch reinforced with fiberglass mesh generally lasts 5 to 10 years on static, atmospheric storage vessels.
However, its overall lifespan depends on thermal swings, the level of vibration from connected pumps, and whether internal corrosion continues beneath the surrounding surface. Think of external patches as long-term bridge solutions—plan for a complete interior relining or tank replacement down the road.
Conclusion
Stopping a water storage tank leak takes a methodical approach: locate the true source of the water, choose a repair technique matched to your tank's material, and never skimp on surface preparation. While plastic welding, hydraulic cement, and structural epoxy cold-welding can add years of life to cold storage cisterns, pressurized hot water tanks require replacement once their inner lining fails.
At Admiral Plumbing, Heating & Cooling, we've delivered dependable plumbing solutions across Northern Utah for decades. Whether you need an emergency repair or want to explore upgrading to a high-efficiency Navien NPE-240S tankless water heater to eliminate tank leak worries entirely, our team is here to help.
Contact our certified technicians for prompt 24/7 emergency service or professional leak assessments across Provo and the surrounding communities.


Comments